The advantage of an electric boiler over other water heaters is versatility. The storage tank is suitable for any apartment and private house, since it consumes only 1.5 ... 3 kW of electricity. Installation permission is not required, for the sake of economy, installation is done independently. How to install a water heater and connect it to the water supply with your own hands, we will describe in this instruction.
Choose a boiler - how many liters will be needed
We decided to touch on this topic, since the normal provision of a house with hot water supply (in short - DHW) depends on the volume of the water heater. Buying a tank with a large supply of water is also meaningless:
- heating time increases to a comfortable temperature;
- the price of equipment rises;
- installation of a storage water heater becomes more complicated due to the large weight of the device + a decent amount of water.
Tip. If the heater is needed only for washing dishes, it is better to buy an electric flowing model of low power, which is placed under the sink in the kitchen or instead of the mixer. How to choose the right electric heater for a summer residence, read in a separate publication.

The capacity of the storage tank is selected by the consumption of mixed (warm) water per 1 tenant per day - 20 l for hygiene needs, another 12 l - for household. How many liters do you need as a result?
- with economical consumption, a family of 2 people is enough 50 l, comfortable - 80 l;
- 3 pax - 80 ... 100 l;
- 4 family members - 100 ... 120 liters;
- 5 or more residents actively using hot water - 120 ... 150 l.
Briefly about the principle of operation of the drive
For the correct installation and connection of the water heater to utility networks, you need to know the device and the principle of operation of the device. The design and operation scheme looks like this:
- The main tank - stainless or enamelled steel - is filled with cold water through a pipe that goes into the lower zone of the tank.
- When filling, the air is completely displaced into the DHW system through a hot water intake pipe located in the upper zone of the tank.
- After turning on the boiler, the water is heated by a tubular electric heater (abbreviated as TEN), which is built into the bottom of the tank.
- An automation unit, an immersion temperature sensor and a thermostat, is installed on the same site as the heater. When the temperature of the tank reaches a predetermined threshold, the automation de-energizes the heater. After cooling the water by 3-5 ° C, the thermostat switches on heating again.

- At the entrance of the water supply, a boiler safety group is placed. The part consists of a safety and non-return valve, the function is to relieve excess pressure from the expansion of the heated fluid and prevent water from flowing back from the tank into the pipe.
- Next to the heating element is a magnesium anode, which protects the tank metal from electrochemical corrosion. Outside, the container is insulated with a layer of polyurethane, then closed with a decorative casing, as shown in the diagram in section.

Reference. The power of the heating element is 1.5 ... 3 kW, depending on the volume of the tank. Some flat models of storage boilers are equipped with two electric heaters.

The arrangement of the vertical and horizontal type boilers is identical - the intake pipe is at the top, the supply pipe is at the bottom. This raises the main problem of servicing any storage water heater - it is impossible to drain the water through the tap. The question is solved in different ways, depending on the strapping scheme, which we will consider later.
Water heater installation instructions
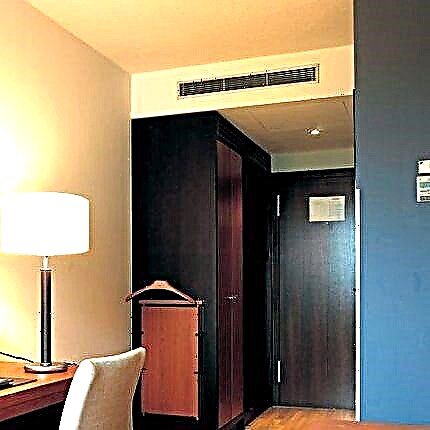
Before installation, or better, at the purchase stage, we determine the location of the boiler.There are no restrictions - the device can be installed even in the attic or in the basement of a country house. These options are not excluded, but we recommend that you adhere to the following rules:
- The best option for an apartment is to fix a horizontal apparatus over the bathroom. In case of an accident, do not flood the neighbors. Hanging up a vertical model of a water heater is not worth it, you can hit your tank with your head while washing.
- Another place in the apartment is the toilet, the boiler is placed in a niche above the toilet. The positive point is space saving, minus is the inconvenience of service. If a leak occurs, you risk flooding the neighbors, you need to waterproof the floor.

- In a private cottage, the heater can be placed in any non-residential premises. The main condition is closer to the points of water consumption, so that when you open the tap you do not have to drain a lot of cooled water from the pipes. Suitable rooms: kitchen, bathroom, laundry or boiler room.
- Provide access for servicing the appliance. Leave at least 50 cm of free space on the side of the nozzles (bottom or side) so that you can connect the hose, replace the bucket, remove the magnesium rod or heater in the repair process.
- From the water heater to the nearest walls and ceiling, indent 50 ... 100 mm. Reason: dust accumulates on the case (especially at the top), it needs to be wiped somehow.

Information for consideration. In the passport of a Termex water heater (Termex), the manufacturer indicates: if the user decides to install the device in an inaccessible place, then he will be forced to pay for warranty service. In case of replacement, the heater is dismantled independently or at its own expense.
The horizontal version of the boiler cannot be placed vertically and vice versa. There are universal models that work in both positions, but in practice the water heater rarely has to be rearranged. Unless when replacing or moving to another place.

Wall Mounting Methods
One of the disadvantages of storage units is the large mass. For example, a wall mounted Ariston tank (50 liters) weighs 18 kg without water, and a gross weight of almost 70 kg. The weight of a 100-liter net heater is 30 kg; the total weight easily reaches 130 kg.
Heavy weight boiler tanks have to be fastened to different walls:
- from dense materials - concrete, brick, wooden timber, logs;
- from porous building materials - aerated concrete, foam blocks;
- to frame-type partitions, sheathed with drywall, OSB plywood.
Do-it-yourself installation of a water heater on a concrete wall is carried out using expansion anchors equipped with nuts. The technology is simple: mark the mounting points on the standard tank bracket, drill holes, insert anchor bolts and fasten the boiler with nuts. The depth of the hole and the length of the fasteners are at least 7 cm.

Note. Small devices of 30 ... 50 l with one hanging bracket can be mounted on plastic dowels and hooks (or bolts). Water heaters with two brackets cannot be hung on hooks - you will not guess the exact position of the holes so that the load is distributed over 4 points evenly.
In log and timber houses, the problem is solved even easier - a bolt or hook Ø8-10 mm is screwed into the prepared hole of an identical diameter. To hang the boiler on aerated concrete or porous brick, the following methods are used:
- Light water heaters with a volume of 30-50 liters are attached using plastic dowels designed for foam concrete (shown in the photo below).
- Heavy tanks of more than 80 l are suspended on special metal dowels, where bolts with ordinary metric threads are screwed.

- In materials with large pores and air spaces (for example, ceramic blocks), chemical anchors will hold the boiler.
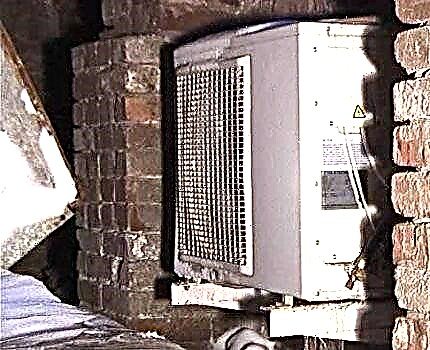
- If the unit is located in a boiler room or other utility room, where the appearance does not play a role, a round support from a strip and 2 steel pipes is welded. The tank is fixed to the wall with simple dowels.


The most difficult thing is to install a water heater on drywall constructions, especially after apartment renovation, when the bathroom walls are already tiled. Although GKL sheets with a thickness of 12.5 mm are able to withstand rather heavy objects, it is impossible to mount the boiler directly to drywall, fasteners can break out at any time.
What techniques do masters use when installing a water heater on a drywall base:
- The most reliable way is to use embedded parts made of wood. The beam is inserted inside 2 vertical profiles of the frame, between them at the required height there is a horizontal bridge - a wooden board 30 ... 50 mm thick. After sheathing, a boiler is screwed to it.
- We trim the finished plasterboard finish with an additional sheet of gypsum plaster on the wall section where it is planned to hang the water tank. For fastening to a two-layer construction, we use the Hartmut dowel from the Knauff brand, which can withstand a load of 50 kg at 1 point.

- We make a metal plate with hooks for the boiler, fasten to the frame profiles at 6-8 points. If wooden mortgages were not installed, then the unit over 50 l cannot be mounted on profiles.
- Folding molly metal anchors can be used on the tiled wall. It is important to clearly choose the length of the fastener, as the wizard does in the video:

Water boiler connection - 2 proven circuits
Manufacturers of water heaters recommend connecting the device to the pipes of the water supply system in a straightforward manner. That is, there is no fittings and fittings between the safety valve and the cold water fitting. How to make the recommended boiler strapping:
- Suspend the unit to the wall in the desired position. Directly fasten the safety group to the cold water pipe, thread, of course, seal with linen or thread (FUM tape is not the best option).
- Install a shut-off ball valve with a diameter of ½ “(DN15) in front of the valve.
- You connect pipes to the tap thread and the hot water fitting. The joints are made detachable - you need to use fittings with a union nut (American). It is allowed to use flexible eyeliners - finished braided hoses.
- Put a flexible tube on the outlet of the relief valve, lower the end into the sewer, and preferably in a transparent plastic bottle. Then you can notice the element malfunction or pressure problems in the system in time.
- To check the tightness of the joints, fill the tank - open the hot tap on the mixer and water supply. Wait for water to flow from the mixer.

Clarification. When tying a horizontal water heater (with side pipes), a 90 ° elbow is first installed on the inlet fitting, then a valve. The drain spout of the element should point down.
The disadvantage of the scheme is the difficulty of emptying the tank, to drain it is necessary to unscrew the pipes. If the boiler is installed in a country house or in a country house with periodic heating, it is worthwhile to use a piping with a drain tap, shown in the picture.
A tee with a side valve appears between the non-return valve and the fitting, which serves to quickly empty the tank. The shut-off valve on the hot line is placed in one case - when the water heater is connected to the pipes of the centralized DHW system.

Tip. To connect the device to the water supply, try not to use flexible hoses, it is better to approach the fittings with pipes - PEX – AL – PEX metal-plastic, PPR polypropylene. The eyeliners do not last long and begin to flow in the middle of the night, when the pressure in the network rises to the maximum.
How to apply power
Accumulative boiler refers to household electrical appliances with increased power. The device must be powered by a separate cable line coming from a common distribution panel. How to connect the water heater to the electrical network of an apartment or a private house:
- To supply voltage from the shield to the boiler, use a three-core copper cable of the VVG type. Select the section of wires according to the power of the unit, using the table.

- To protect the supply line, install a differential two-pole circuit breaker with a tripping current of 30 mA, as shown in the diagram.
- The connection of a grounding conductor is a mandatory requirement of safety rules.

- To connect the wires to the contacts of the heater, remove the protective plastic cover (usually rests on 2-3 screws).
- It is not necessary to install a socket for a water heater. But if the device is equipped with a factory plug, then the outlet can be neatly placed on the side of the tank.


Conclusion
It makes no sense to hire craftsmen and pay money if you are able to install and connect a water heater yourself. The procedure is quite simple, except for one operation - hanging a heavy tank on the wall, here it is better to call an assistant. In addition, a professional installation is not always the case, often the installers perform everything correctly, but messy.