Modern built-in appliances for the kitchen are designed for do-it-yourself installation, so washing machines, dishwashers, refrigerators and ovens are equipped with detailed instructions, diagrams, templates, sets of fasteners.
But first you need to prepare a place, pay attention to the issue of supplying communications, think through all the details of the connection.
To make it easier for you to understand the rules for installing a dishwasher, in this article we have provided step-by-step instruction, where each stage of work is examined in detail. With this guide, installing a built-in dishwasher will be quick and easy.
Preliminary work before installation of the PMM
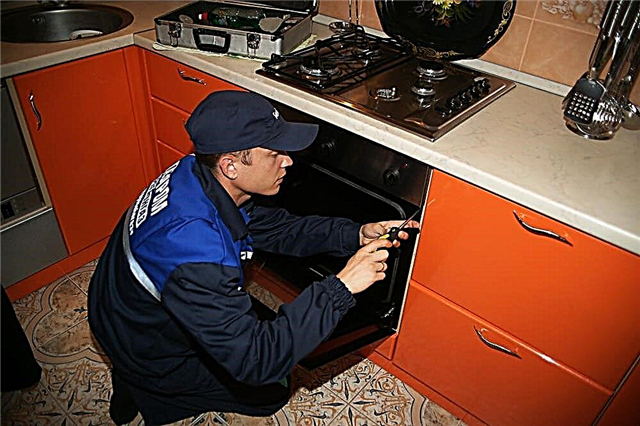
There are two options for installing a dishwasher: independent and with the help of specialists. In the first case, you risk connecting the car incorrectly, in the second you will have to part with part of the family budget.
Sometimes the skills of one master are not enough, you have to call a team of specialists: a furniture collector, plumber and electrician.

Services for installing embedded equipment are offered by companies that implement it. For a fee, at the appointed time, a master station wagon arrives, carries out all the connection work and checks the condition of the machine
However, if you carefully study the installation instructions, consider connecting hoses, find or install an additional outlet, you can save money and acquire new skills by doing everything yourself.
Selection of a place taking into account dimensions
An important step - choosing a place for installation. For the built-in model, furniture modules of the first level are suitable, that is, cabinets standing on the floor.
But if you liked the compact mini-dishwasher, then installing it is a little easier - you can insert such a technique at the level of the belt or chest (for ease of maintenance).
There are several conditions for choosing a good place. If they are not complied with, in the future you may encounter problems of supply / drainage of water or maintenance of the PMM.
Image Gallery
Photo from
The furniture module adjacent to the washing unit is the most suitable place, as there are water supply and drain units nearby, so it is easy to connect hoses. The length of the hoses should not be large, otherwise the flow and discharge of liquid is difficult, which often leads to breakdowns
Prudent owners even at the stage of planning the interior or repair think about holding several outlets with grounding for powerful household units. If there is no free electric point, you will have to draw an additional line
The machine should fit freely inside the furniture module, with a margin of 5 cm on each side - more precise information is given in the instructions. The cabinet walls must be strong and support the fasteners and the weight of the dishwasher. No rear panel provided
You should not hope that the car is mounted once and for all. Sooner or later, replacement of parts, reconnection of hoses or cleaning of some elements will be required. Therefore, installation is carried out in such a way that possible dismantling is easy, and access to communications is open
Built-in dishwasher next to the sink
Separate outlet with ground for dishwasher
The appropriate cabinet for the dimensions of the dishwasher
Dishwasher service
A lot of installation difficulties arise when the dishwasher is integrated into an already installed kitchen set. You have to adjust the size of the cabinets, and sometimes dismantle and remodel part of the furniture.
We recommend taking care of the installation site before buying furniture. This also applies to other household appliances that require embedding. Usually, they first choose the models they like, and when drawing up a sketch, the headset takes into account their location and exact dimensions. Recommendations for choosing a built-in dishwasher we have given in this material.
Preparation of tools and materials
Manufacturers of embedded PMMs sometimes list in the manual which tools may be useful during installation. However, they expect that preliminary work has already been done.
If measures are required to lay a power line or insert into a pipe, the list of necessary items will increase.
To insure and save time, stock up on the following tools:
- hammer drill or powerful drill;
- adjustable wrench;
- a hammer;
- a set of screwdrivers, including flat and Phillips;
- chisel;
- pliers;
- laser level;
- tape measure, square, pencil;
- screwdriver.
In addition to tools, connection details are required. Used elements are not recommended for use - this will reduce the useful life.
To install the outlet, you need to buy the electric / installation product itself, the socket for it, a three-core copper cable, an additional protective automatic device.

There are special requirements for the outlet: it must be of the “European” type, with grounding, preferably with protection against moisture, fully operational, without damage
To connect the water, you will need a metal tee for tapping into the water supply, a fum tape, a tap for cutting off water, rubber gaskets, clamps or ties for fastenings.
If the siphon is not intended for connecting another drain hose, then it will also have to be changed.
If the voltage in the network often fails, we recommend that you purchase a stabilizer. It can be installed on multiple devices at once.
Stages of communication
By the time of connecting the dishwasher, it is necessary to prepare a power line suitable for power characteristics.
And also to provide a place for connecting the hose to the cold water pipe (or tap of the mixer), the hole for the drain hose is better not directly into the pipe, but into the siphon, which is under the sink.
Stage # 1 - Electrical Wiring
So that the dishwasher or other household appliances do not experience interruptions or emergency problems with the supply of electricity, it is necessary to take care of the stability and safety of the entire line, which begins in the electrical panel and ends with a power outlet.
The following construction activities may be required:
- Wall chipping for internal wiring. “Draft” works of this type are carried out using a chamfer or puncher even before the installation of a kitchen set.
- Installation of a circuit breaker in an electrical panel with a rating of 16A, class "C". For each powerful unit - a boiler, washing machine, dishwasher - it is better to mount a separate protective device.
- Three-core copper wire from the electrical panel to the installation location of the outlet. One option is VVGng 3 * 2.5. This is a non-combustible wire that can withstand loads of up to 3.5 kW.
- Installation in the wall of the socket and wiring.
- Socket Installationconnecting cable.
After connecting, be sure to test - turn on the machine, and then use any household appliance to check.

Work on gating and laying the cable, as well as installing the outlet can be carried out independently, but to install the machine in the shield you will have to invite an electrician from the management company or another service organization
Instead of one outlet, it is allowed to install a block of 2-4 outlets, but so that the total load of all electrical appliances connected to the line corresponds to two important indicators: the cross section of the VVGng copper cable and the rating of the machine.
Stage # 2 - tapping into the water supply
Connecting a cold water supply is a little more complicated than a drain hose.
At the outlet of the pipe or at the connection point of the mixer, a tee should be installed so that water flows simultaneously in two directions - to the dishwasher and the sink tap.

It makes no sense to install two separate parts - a tee and a tap, when there are tees specially designed for dishwashers or washing machines with the ability to cut off water
If you want to connect only the inlet hose of the dishwasher, the procedure is as follows:
- We shut off the water and relieve excess pressure by opening any water taps.
- We turn off the flexible inlet of the mixer from the branch pipe of the water pipe or adapter.
- To tighten the connection onto the thread, wrap the fum tape or linen with Unipak paste.
- We mount the tee so that the crane is in a comfortable position.
- We connect a flexible eyeliner of the mixer. If the old gasket is worn, immediately change it.
- We check the operation of the tap: we shut it off and open the water supply to the kitchen. If there is a leak - tighten the threaded connections or change the defective product.
- We attach the drain hose by tightening the union nuts. Before that, we check whether the sealing rings are in place.
It is important that the water supply hose does not twist and does not bend, otherwise the washing process will be difficult.

Dishwasher hoses are equipped with Aquastop devices with solenoid valves to prevent leaks. These are bulky devices, therefore, before connecting, you must ensure that there is free space for their placement
If preparation for the connection is made in advance, and plans are to install several household appliances that need water, then it is better to use a collector rather than a tee.
The adjustable device (collector) has from 3 to 5 outputs. This is enough to ensure PMM water intake, washer, water boiler and filters.
Stage # 3 - drain device
There are several options for integrating the drain hose into the sewer system.
The most successful is the connection of the output end to the siphon nozzle, which is installed under the sink.

An economical and easy way to drain. The hose is connected to the outlet pipe of the sink siphon using a plastic corner adapter and a metal clamp
Not all siphon models are suitable for additional PMM connection. If the water seal is not designed for this, it may be possible to build it up as a separate element with a nozzle.
However, the cost of the products is low, so it is better to buy a new device, originally designed for additional connection of a washing machine or dishwasher.

Plastic siphons have a simple collapsible design and are equipped with clear instructions, so installing the product and connecting the hose from the PMM is not difficult
Due to the fact that the water first enters the siphon, sewage odors from drains with biological waste will not spread to the entire apartment.
For this reason, it is not recommended to discharge the drain directly, without a water seal or at least a loop, into the sewer.
Subtleties of installing a dishwasher in a cabinet
If the cabinet was ordered to fit the dimensions of a particular model, then installation problems should not arise.
The dishwasher housing is freely placed in a niche, while small gaps are left on both sides. To reduce vibration, seals are glued to the walls.

When installing some dishwashers, for example, Bosch, there is a mandatory part - a metal protective plate, fixed on the bottom surface of the countertop. Other brands may not have it.
To take into account all the nuances of the connection, the machine must be installed in the following order:
- try on first - push the unit into a cabinet or a niche, check the conformity of dimensions, the ability to connect;
- put forward and carry out preparatory activities - fix the mounting plates, fasteners and steam protection;
- connect hoses, slide the housing into place;
- install decorative panels.
The difficulty is that the models of different manufacturers are different, therefore, some installation moments also have differences. In order not to be mistaken, you must carefully study the instructions and step by step follow all the recommendations.
A few tips that may come in handy during the installation of the dishwasher:
Image Gallery
Photo from
Correct insertion of fixing sleeves
Adjusting the legs of the dishwasher
Measurement of actual niche parameters
Instructions and installation recommendations from the manufacturer
Before “landing” a decorative facade on a car door, first degrease its surface, then glue a double adhesive tape, and a panel on it. This is necessary in order to be able to adjust the position of the pad.
When it becomes clear that the holes on the door and panel are the same, you can take a screwdriver and tighten the screws. We recommend that you familiarize yourself with the detailed instruction on installing the facade on the dishwasher.
Lastly, a side mount is made. On the inside of the case, insert the screws into the holes opposite the bushings and also screw them with a screwdriver. It is forbidden to use nails, otherwise during dismantling it is possible to deform machine parts.
Hose connection and testing
We attach the hoses to the machine at the very end, but before the side mount is completed.
The housing extends forward to allow access to all nodes. Both hoses are usually attached to the housing on one side, at the top or bottom.
They protrude a few centimeters, and to provide space in the closet, they usually simply remove the back wall.

Connection is carried out as described above: hoses are inserted into the holes and secured with union nuts or clamps. A special tool for fixing is not necessary, everything is done manually, with a screwdriver or pliers
After connecting the machine is installed in place for testing. We turn on the machine on the shield, then plug in the outlet, provide water and press the button "Test" or "Start". How to perform testing correctly is explained in the instructions.
If there are no leaks, the machine does not beat against the countertop or walls, and the test cycle of washing passed without incident, which means that you managed to install the dishwasher with your own hands.
But before you start using it, it is advisable to familiarize yourself with the rules of operation and maintenance of the machine.
Serial integration of a Bosch machine:
Subtleties of calculations for the built-in model:
Tips for connecting a tee:
You can begin to take any steps to install the built-in model if you are confident in your abilities and have experience installing such household appliances. In the opposite case, it is better to either act under the guidance of a master, or invite specialists.
Do not forget that connection errors can play an unpleasant role when the question arises about warranty repair.
Do you professionally install and connect dishwashers and want to share your knowledge with other users? Please write recommendations below under this article, share your rich experience with beginners.
If you still have questions about the installation or you can’t figure out a specific installation nuance, ask our experts for advice.