An autonomous heating system is the dream of many homeowners. Most of them choose gas heating, a significant drawback of which is the mandatory installation of equipment by certified specialists. However, control over the actions of the invited workers is still needed, agree?
Here you will learn how to install a floor gas boiler according to building rules. We will tell you how to prepare the room for installing a heat generator, how to properly organize the removal of combustion products. Our tips will help you build a safe and efficient system.
The information presented for reference is based on regulatory documents. To optimize the perception of a difficult topic, the text is supplemented with useful illustrations and video instructions.
Preparation for the installation of gas equipment
Those who are sure that the installation of a gas heating device begins with its purchase are greatly mistaken.
Begin by collecting permits. Simultaneously with the receipt of the necessary papers, you should take up the selection and preparation of the place for the installation of the heating unit, while the following regulatory requirements must be taken into account:
Image Gallery
Photo from
Boiler room for a gas boiler and equipment
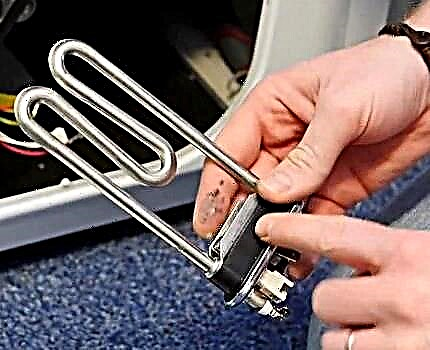
Pipes and fittings for connecting a gas boiler
Requirements for installing a gas boiler in a house
Strengthening the base for installing a floor boiler
The specifics of installing a single-circuit unit
Rules for finishing the floor and walls of the boiler room
Admission to installation and adjustment of the gas boiler operation mode
In order to get permission to install heating equipment, you need to go through several stages:
Step # 1: Obtaining Technical Specifications and Permits.
It is necessary to find out whether, in principle, it is possible to install a gas boiler in a particular apartment or house. For this, an application is submitted to the gas service with a request to carry out such a procedure. It necessarily indicates the estimated annual gas consumption.
The document will be considered and as a result, the applicant will receive permission to install along with the Technical Conditions or a reasonable refusal.
Step # 2: Creating a project for future installation.
For starters, it is advisable to determine the brand of the meter and boiler, but so far they should not be purchased. Then the installation project is ordered. It is carried out on the basis of previously obtained permission for specific equipment.
The document must specify the equipment connection diagrams, and the laying of the trunk inside the building from the gas connection point. Only a licensed company is entitled to engage in the project.

Gas boilers are the most practical and economical option for space heating. Can be used both in an apartment building and in a private house
Step # 3: Getting approval from the gas service.
The new project must be coordinated with the gas service, which serves the site on whose territory the house is located. The procedure usually takes a maximum of three months and a minimum of a week.
At this stage, it is already possible to purchase gas equipment, because in addition to the project, the following documents must be submitted for approval:
- technical passport of a gas boiler;
- certificates of conformity and sanitary;
- operating instructions for the heater;
- expert opinion on the compliance of the device with all technical requirements.
Obtaining these documents is very simple. The manufacturer obligatorily attaches them to its products. At the end of the verification procedure, the applicant receives an agreed draft, which in this case will be stamped.
If the document is not agreed, a list of measures must be drawn up to adjust the project. After they are held re-approval.

To install a floor boiler, a special furnace room, trimmed with non-combustible materials, is necessarily allocated
Rules for furnishing a furnace room
According to current SNiPs, a gas boiler is installed only in a specially equipped room called a furnace.
This rule cannot be neglected, since a gas boiler belongs to the category of potentially dangerous equipment, and it should be handled with extreme care. Otherwise, penalties will inevitably follow and emergencies may occur.

The best option for installing a floor gas boiler is to organize a boiler room isolated from residential premises, equipped with a supply and exhaust ventilation system
First you need to calculate the power of the gas boiler, then determine the location for installing the boiler. The instructions allow the placement of single-circuit heating appliances with a capacity of not higher than 60 kW in any room of the building. Most floor gas units are single-circuit, because Designed for servicing heating systems only.
Dual-circuit models of any power cannot be installed in the kitchen. These are miniature boiler rooms with a built-in security group and their own expansion tank. For them, a furnace is being equipped. If the total power of the equipment does not exceed 150 kW, it can be mounted on any floor.
More powerful installations or groups of appliances can only be installed on the ground floor or in the basement. In any case, gas heating boilers are not allowed to be installed in living rooms, bathrooms and in bathrooms.
A room intended for a furnace must have certain dimensions. Its minimum volume can be calculated by the formula: 0.2 m³ multiplied by 1 kW of device power, but not less than 15 m³.

If the walls of the furnace room are made of combustible materials, they are covered with special refractory linings
In addition, a number of requirements are imposed on the premises:
- the minimum width of the doorway should be 80 cm;
- minimum ceiling height - 2.5 m;
- fire resistance not less than 0.75 hours;
- the presence of natural light, which is calculated as follows: 0.03 square meters. m of window area for every 1 cubic meter of furnace volume;
- the presence of a gas analyzer associated with an automatic valve that shuts off the gas supply in the event of a leak;
- arrangement of effective ventilation;
- the door or wall leading to the next room should be equipped with a ventilation grill, the area of which is determined by the formula: for every kilowatt of heating device power there is 8 sq. see designs;
- ensuring free access to the heating device and auxiliary equipment for the implementation of repair and maintenance work.
These requirements are strictly binding in the case of furnishing a furnace room for a boiler with an open combustion chamber. For units with a closed chamber, the room area is not important and the ventilation requirements are less stringent, because they do not use air from the room for their work, but take it from the street.
In the furnace, a flue is equipped. Its horizontal section within the premises should not exceed 3 m.

The process of installing a gas boiler largely depends on its device. The figure shows the general scheme of the device of such equipment (+)
Moreover, the number of turns cannot be more than three. The vertical outlet of the chimney is raised not less than a meter above the level of a flat roof or pitched ridge. The materials from which the construction is carried out must be resistant to aggressive thermal and chemical influences.
Multilayer materials, for example, asbestos-cement pipes, can only be used in areas remote from the exhaust pipe by a distance of more than 5 m.
The furnace room should not have cavities or niches formed by horizontal surfaces. Here combustion products can accumulate, which is very dangerous for humans.
The space in front of the heater must be free. The floor in front of it is covered with a metal sheet, the minimum size of which is 1x1 m. It is forbidden to use asbestos cement for these purposes, since it quickly wears out and is harmful to human health.

The predominant number of floor gas units is designed to heat the coolant in heating systems with natural and artificial type of circulation
Preparing the room for installation
Before starting the installation of the heating device, you need to finish all the work related to the arrangement of the heating system, the installation of radiators, the wiring of the water supply and warm water floors, if any. In addition, the electrics and the sewage system must be fully installed.
The boiler room should also be ready. A solid floor based on a cement screed is laid under the gas boiler or a separate foundation is being prepared.
The latter option is not considered the best. Ceilings, floors and walls, if decorated with combustible coatings, must be additionally protected from possible fire.
For this, non-combustible linings are used, made of roofing sheet steel laid on a refractory gasket, such as asbestos. The thickness of the sheet of the latter cannot be less than 3 mm.

Depending on the type of floor boiler, the number and type of auxiliary equipment varies. The figure shows a possible installation diagram of the system paired with a wall unit
In this case, the insulation must protrude beyond the dimensions of the device’s body along the entire perimeter by at least 100 mm. The minimum distance from the heater to the wall made of non-combustible materials should be 100 mm.
The distance from the protruding fragments of the fittings, burners and automatic control devices to the opposite wall is also regulated. It must be at least 1 m.
If the floor is made of combustible material, it should be protected from possible fire. For this, a platform lined with concrete blocks is used. Its height should be at least 100 mm.
From above, the elevation is covered with a steel sheet, the thickness of which is at least 0.8 mm. It is possible to equip the site for the installation of the device from special refractory plates.
In addition, it is advisable to install auxiliary equipment, otherwise the boiler will interfere with this. It is optimal to pre-execute the scheme of its placement in order to think through all the nuances of the arrangement.
According to this scheme, mounting holes are planned on the walls and floor, after which the necessary devices are installed. The heater is installed and connected last.

Chimney design options for gas boilers of various types
Chimney: requirements for arrangement
Before installing the floor gas boiler with your own hands, you should prepare a chimney. It is advisable to set the heater on the prepared base, so that the distance between its body and the wall is sufficient for inspection and maintenance of the device. Then mark the location of the chimney.
You can not put the boiler, but markup based on calculations. In this case, several nuances must be taken into account.
First of all, the chimney of the gas unit and the hole for it must exactly match the type of floor boiler. So, for modifications with an open combustion chamber, a separate type chimney is installed with a cross section corresponding to the power of the device.
For example, for devices with a power below 30 kW, the pipe diameter should be at least 140 mm; for more powerful devices from 40 kW, a chimney with a cross section of 160 mm or more is selected.
Devices with a closed combustion chamber are equipped with special coaxial chimneys. In the technical documentation of the device, the manufacturer always indicates the required diameter of the chimney.
In addition, it must be remembered that the pipe that will connect the boiler to the chimney should not be longer than 0.25 m. It is mandatory to equip a closing hole through which the structure will be cleaned.

When installing a chimney, strict compliance with all fire safety standards is mandatory
The chimney from the boiler installed in one of the apartments of a multi-storey building must necessarily be diverted into a common chimney. If there is no such system, gas services do not issue permission to install the boiler. In a private house, everything is much simpler. Here you can mount a chimney of almost any configuration. It is important that it is safe and effective.
According to current regulations, the chimney cannot be mounted near a window opening. The minimum distance between them is 0.6 m. This is necessary to exclude the possibility of returning exhaust gases to the room.
In practice, sometimes supervisory services allow you to install equipment directly under windows. In this case, it is necessary to make the exhaust pipe as far as possible from the window leaf or the opening sash.
A photo selection will introduce the features of using steel chimneys:
Image Gallery
Photo from
Pipe floor gas heating boiler
Using metal quill tubes
Passage of a metal pipe through the ceiling
Branch of a metal chimney of a gas boiler
The technology of installing a gas boiler floor type
First of all, you should remove the device from the packaging and check its packaging again. To know what should be in the box, you need to take the operating instructions, which the manufacturer obligatorily puts in the package, and check everything according to it.
If a shortage is found, contact the seller immediately. The same thing needs to be done when there are traces of repair work, dents, etc. on the device’s case.
Another important point is the verification of technical data. Those that are applied by the manufacturer to the device case must exactly match those that are inscribed in the technical passport. In case of discrepancy, contact the seller.
All plugs are removed from the device, if necessary, pipes are flushed. So you can be sure that they do not have random debris that could get inside during assembly.

The floor gas boiler is mounted on a sturdy podium made of refractory material
The installation process for outdoor equipment can vary greatly depending on the type and modification of equipment. In general terms, it represents the installation of the device in its intended place, the subsequent connection of communications and the arrangement of the chimney. We will consider each stage in detail.
#1. Installation of a heater
First you need to put the equipment in the place prepared for it. It can be a concrete base, a small podium made of a refractory slab, etc. A strong wooden floor is covered with a metal sheet, which should protrude about 30 cm from the boiler body around the entire perimeter.
For private houses, another option is used. Here, for the heating appliances, a depression is prepared that is 0.3 m below the floor level.
The bottom of such a pocket is poured with concrete, and the walls are finished with any non-combustible material. More often tiled.A floor-mounted gas boiler is usually a fairly massive equipment.
For its transportation, wheels are used, which the device most often supplies the manufacturer. The device is mounted on a prepared base and carefully leveled.

The figure shows a diagram of one of the options for installing a floor gas boiler
It must be understood that the smooth operation of the device largely depends on the accuracy of its exposure. Therefore, the horizontal installation must be checked using the building level.
The equipment is leveled in place with adjustable legs. If not, small pieces of any non-combustible material, such as a metal sheet, are placed under the supports.
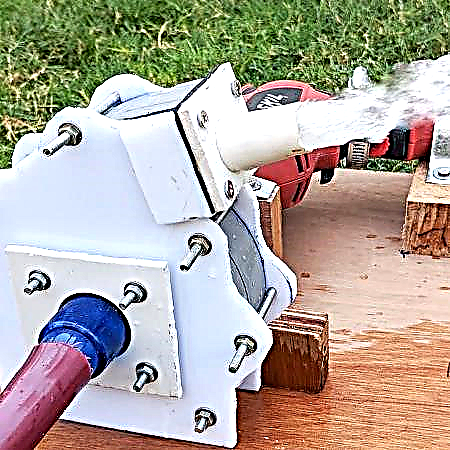
# 2 Chimney flue installation
First you need to make holes for the chimney. Once again we check the diameter of the planned parts, it should be slightly larger than the cross section of the chimney pipe. We make holes in the ceiling and in the roof.
Then we put on the adapter adapter to the boiler outlet pipe, which will be connected to the chimney. An important nuance. Corrugation, as with the installation of wall devices, in this case is strictly prohibited.
The adapter should only be made of sheet metal. After installing the parts, we install a tee and the so-called revision, through which the inspection and cleaning of the chimney will be carried out.
Next, the remaining elements are attached: straight pipe and bend segments. To pass the chimney through the ceiling and roof, special parts are used. Particular attention should be paid to fire safety.

A special nozzle is installed on the upper part of the chimney, which protects the structure of precipitation, debris and wind
Therefore, sections of the passage through the floors must be equipped with non-combustible materials. The chimney must be mounted under a slight slope towards the street. The exact value of the slope can be found in the technical documentation for the boiler. This is necessary for the unimpeded removal of condensate, which inevitably accumulates in the pipe due to temperature differences.
The assembled structure is securely fixed to the wall or ceiling with clamps and brackets. The fastening step of the first is 2 m, the second is 4 m. It is recommended to strengthen the connections of the elements, for this they are tightened with clamps, tightened bolts or wire.
The pipe brought to the surface of the roof or to the wall is raised to the desired height, after which a tip is installed that will protect the chimney from precipitation, debris and wind.
You can familiarize yourself with the assembly and installation technology of a coaxial chimney in a popular article on our site.
# 3 Heating system connection
At this stage, you need to connect the boiler to the drain and feed pipe of the heating system. For a single-circuit device, this will end the work. For a dual-circuit, you still need to connect to the water supply.
First we connect the heating pipes. Depending on the current heating system, which can be either two or one-pipe, the number of pipes for connection can be different.

All connections must be made in strict accordance with the rules and regulations, as well as with mandatory sealing
In any case, experts strongly recommend installing a coarse strainer to protect the boiler from scale particles and dirt that can get into it from the heat main.
The heater is not very sensitive to the quality of the coolant, but if its parameters are very different from those recommended by the manufacturer, additional cleaning equipment should be installed.
This may be, for example, a polyphosphate dispenser or other similar system. It is advisable to install shut-off taps on the return line and on the supply, which will help prevent airing of the radiators and make repair of the heating device more convenient.
All connections of elements are carried out strictly according to the rules with mandatory sealing. To seal the threads, you can use the usual tow and paint or more modern means.
The procedure for connecting the boiler to the water main is carried out in almost the same way. It is also strongly recommended that a filter be installed to prevent unnecessary contaminants from entering the device. It is also advisable to install shut-off taps on water pipes.
It is best to use the so-called "American" with detachable joints, which allows you to quickly replace a worn assembly if necessary and greatly simplifies installation.

Only tow can be used to seal gas pipe connections.
#4. Gas connection
You need to know that according to the norms for installing gas floor boilers, only an authorized person can perform this operation. You can do the work yourself, but to carry out an assembly check and do the first start will, after all, be an invited professional.
Connection work is carried out extremely carefully and accurately. Start by connecting a gas pipe with the corresponding element of the boiler.
As a sealant, you can use only tow. No other material will give the required tightness of the connection. Mandatory installation of a shut-off valve, which is additionally equipped with a filter.
At the same time, gas workers strongly recommend installing a high-quality system here. An insufficiently effective filter can cause a boiler breakdown.
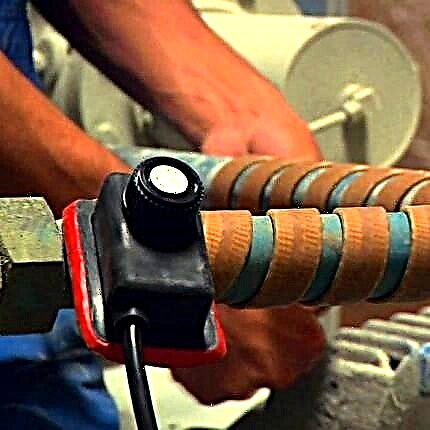
For connection, it is recommended to use copper pipes, the diameter of which can vary from 1.5 to 3.2 cm, or special corrugated hoses. In any case, special attention should be paid to the quality of sealing joints. Since the gas tends to seep out of leaks and accumulate in the room, which is fraught with the creation of an explosive situation.
Behind the filter should be a flexible connection, which is done only with a corrugated hose. Rubber parts are strictly forbidden, because over time cracks appear on them, creating channels for gas leakage.
Corrugated parts are fixed to the boiler nozzle using a union nut. A mandatory element of such a connection is a paronite gasket.

After installing and connecting the gas heating unit, it is necessary to check the quality of the joints and components. The simplest control method is to apply a soap solution to the compound. If it bubbles, then there is a leak
#five. Test run
On this, the basic work on connecting a gas boiler has been completed. An exception is appliances with a closed firebox. For them, it is necessary to connect to the electrical network. It is better to do this through a stabilizer.
Then the system can be filled with coolant. This is done as slowly as possible in order to displace most of the air present in it. The fluid is pumped to a pressure of 2 atm.
All connections are carefully checked for possible leaks. After the representative of the gas service inspects the connection and allows the gas supply, you should also carefully examine all the connections on this pipeline. They need to be coated with soapy water and make sure that there are no bubbles. Now you can carry out the first launch of the equipment.
A service contract should be concluded with a representative of the gas company that carried out the installation of the equipment, according to which the organization undertakes to conduct regular inspections to study the technical condition and repair of the unit as necessary.
Clip # 1. How to install a floor boiler:
Clip # 2. How to avoid errors during the installation of the floor device:
Clip # 3. Example of installation and connection of a gas boiler:
Self-assembly and connection of a gas boiler of a floor type is among the most critical operations, because the safety of all residents directly depends on the correctness of its conduct.
Do not get down to business if there is no experience in carrying out such work. It’s better to invite experts. Arrogance and frivolity can be too expensive.
You can share personal experience in the field of installation and connection of a gas boiler, ask questions to clarify controversial issues, and give useful advice in the block below the text of the article. We are interested in your opinion regarding the information provided. Please comment.